All in One WP Security and Firewall is one of the best WordPress security plugin to make your website secure. It has all the required features to make a website protected by malware i.e. form captcha, firewall, user accounts and login security, filesystem security, and database security.
Steps to configure All in One WP Security & Firewall Plugin
Contents
- 1 Steps to configure All in One WP Security & Firewall Plugin
- 1.1 1) All in One WP Security Dashboard:
- 1.2 2) Settings:
- 1.3 3) User Accounts:
- 1.4 4) User Login:
- 1.5 5) User Registration:
- 1.6 6) Database Security:
- 1.7 7) Filesystem Security:
- 1.8 8) Blacklist Manager:
- 1.9 9) Firewall:
- 1.10 10) Brute Force:
- 1.11 11) Spam Prevention:
- 1.12 12) Scanner:
- 1.13 13) Maintenance Mode:
- 1.14 14) All in One WP Security Miscellaneous Settings:
1) All in One WP Security Dashboard:
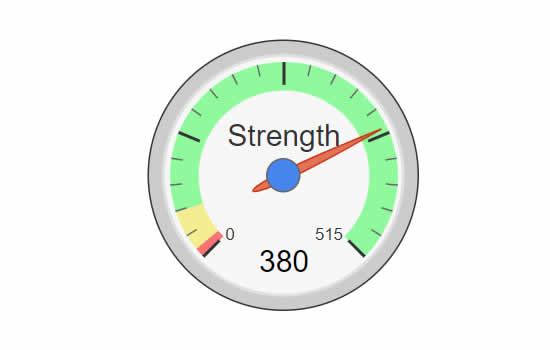
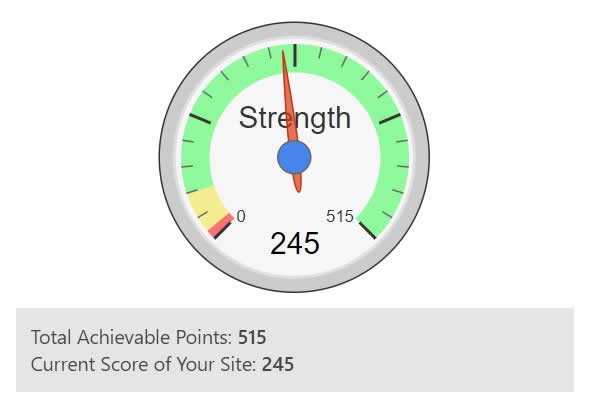
Security Strength Meter: In this interface, you can see “Security Strength Meter”. Which indicates how much your website is secured. Total achievable points are 515.
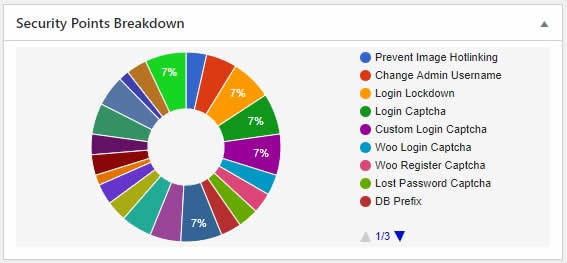
Security Points Breakdown: This interface also shows the “Security Points Breakdown” which you have applied on your website.
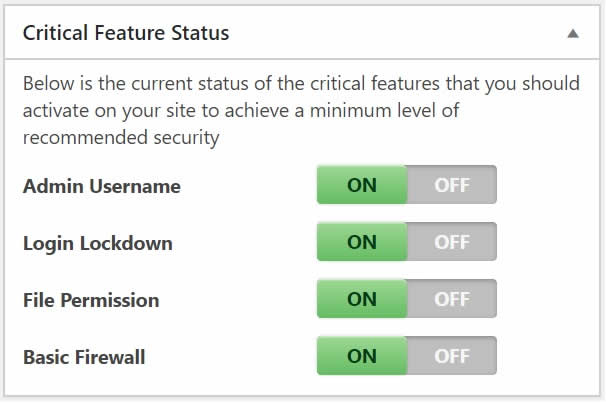
Critical Feature Status: Further down, there is “Critical Feature Status” that shows info about the critical features that you have applied to your website. All these should be “ON” or enabled.
Last 5 Logins Summary: This area shows the summary of the last 5 users’ login info i.e. user name, date and the IP.
Brute Force Prevention Login Page: It shows the info about the renamed login page.
Logged In Users: Here you can see the currently logged in users.
Locked IP Addresses: This widget shows the locked IPs detail.
2) Settings:
General Settings: Here you can “Disable All Security Features” and the “Firewall”. Here you can also enable debug mode.
.htaccess File: Next tab is .htaccess file where you can take backup and restore your .htaccess file.
Wp-config.php File: Similarly, here you can take backup and restore your wp-config file.
Wp-version Info: By enabling this feature, WordPress version and meta info will be removed from all the pages.
Import/Export: here you can export and import (AIOWPS) All in One WP Security settings.
Advanced Settings: Here you can choose “$_SERVER” variable to retrieve the user’s IP address. (If you are not sure then remain this option as it is.)
3) User Accounts:
WP Username: Here you can change the admin’s default user name. To change the “Admin User Name”, enter a new name and click on the “Change Username” button.
Display Name: in the next tab, you can modify the display name. By default, it is “admin”, if so change it.
Password: Here you can set a secure password by using the “Password Strength Tool”. When you’ll start typing a password in the text field, this tool will show you its strength in password strength meter.
4) User Login:
Login Lockdown: Here you can set login lockdown feature. When the user will enter a wrong password after specific no. of times, he/she will automatically be locked down. Here you can also set other options i.e. Allo Unlock Requests, Max Login Attempts, Time Length of Lockout, etc. Here you can also enable the notify by email when a user is locked down.
Failed Login Users: Failed login users will be displayed here.
Force Logout: You can enable force log out of a user after a specific time.
Account Activity Logs: Registered users’ login activity log will be shown here i.e. User ID, Username, Login Date, Logout Date, and the IP address.
Logged In Users: In this interface, currently logged in users will be shown.
5) User Registration:
Manual Approval: You can enable this option if you want to manually approve a newly registered user. If your website is eCommerce then do not enable this option.
Registration Captcha: Set this option to enable Captcha on the registration page. (It is recommended to enable this option.)
Registration Honeypot: You can also enable the honeypot option. It is actually a hidden field that is verified when clicking on the registration button.
6) Database Security:
DB Prefix: This option is set to rename the database table prefix. You can choose the option to auto-generate it or choose your own by entering in the text field.
DB Backup: Here you can set scheduled backups of your website database.
7) Filesystem Security:
File Permissions: In this interface, you can set the recommended directory and file permissions to make them secure.
Disable PHP File Editing: check this option to remove the ability to edit PHP files from the website admin section.
WP File Access: Enable it to prevent access to WordPress default files i.e. readme.html, license.txt, and “wp-config-sample.php” files.
Host System Logs: Here you can enter the system log file name to identify the errors and the warnings of your website.
8) Blacklist Manager:
Ban Users: Here you can “Ban” a specific user by adding his/her IP address. Here you can also restrict the other user agents.
9) Firewall:
Basic Firewall: Here you can enable “Basic Firewall Settings”. Other options on this interface are “Wordpress XMLRPC & Pingback Vulnerability Protection” and “Block Access to Debug Log File”. (Enable all the options on this interface)
Additional Firewall Rules: Enable all the options on this interface i.e. Disable Index Views, Disable Trace and Track, Forbid Proxy Comment Posting, Deny Bad Query Strings and Enable Advanced Character String Filter.
6G Blacklist Firewall Rules: Enable both the options on this section i.e. “Enable 6G Firewall Protection” and “Enable legacy 5G Firewall Protection”.
Internet Bots: Enable it to “Block Fake Google bots”.
Prevent Hotlinks: Enable it if you want to prevent hotlinking to images of your website. By enabling this option your website images cannot be displayed on other websites.
404 Detection: Enable this option if you enable the lockout of the selected IP address.
Custom Rules: If you want to add custom rules in your .htaccess file then add these here.
10) Brute Force:
Rename Login Page: Check this option and enter the new name of your website login page. (please don’t use space or special character for the login page.)
Cookie Based Brute Force Prevention: You can enable it by adding the required info.
Login Captcha: Here you can enable simple captcha or Google reCaptcha on all types of forms of your website.
Login Whitelist: You can whitelist any IP by entering in this interface.
Honeypot: Check this option if you want to add a honeypot on your login page.
11) Spam Prevention:
Comment Spam: Enable both the option on this interface i.e. “Enable Captcha on Comment Forms” and “Block Spambots From Posting Comments.”
Comment Spam IP Monitoring: Here you can restrict a user to submit spam comments by entering the required info.
Buddy Press: This option will be available if you are using Buddy Press on your website and it will add captcha on Buddy Press registration form.
BBPress: Similarly, this option will be available if you are using the BB press on your website and add Captcha on the BB Press topic form.
12) Scanner:
File Change Detection: Enable this option for an automated file change detection scan. Here you can set the time interval and files/directories to ignore. You can also enable notification by email when a file is changed on your website.
13) Maintenance Mode:
If you want to lockout your website for your front-end users then enable this option. Please note that admin and other users can log-in and view your website.
14) All in One WP Security Miscellaneous Settings:
Copy Protection: if you want to restrict a user to copy your website text then enable this option.
Frames: Enable this feature if you want to restrict other websites to display your content/text in an iframe.
Users Enumeration: Check this option if you want to stop user enumeration.
WP Rest API: Enable it if you want to stop REST API access for non-logged users/requests.